What a Difference a Few Weeks Make...

The last time I updated the blog, my tomato seedlings were wee little babies. They had just gotten their first set of true leaves, which meant it was time to move from the seedling container to individual containers. I'm now just a couple of weeks away from transplanting my babies to the garden, so I thought I'd share some photos.

This is my first time growing anything from seed like this. I tried to grow peppers and tomatoes from seed last year, but didn't have grow lights. I do have a sunny windowsill, but my plants got tall and leggy (i.e. useless). This year, I decided to go for the gold, and got some lights.

Here we go:


Just planted

1 week old tomatoes.
-

10 day old peppers. They are slow growers.


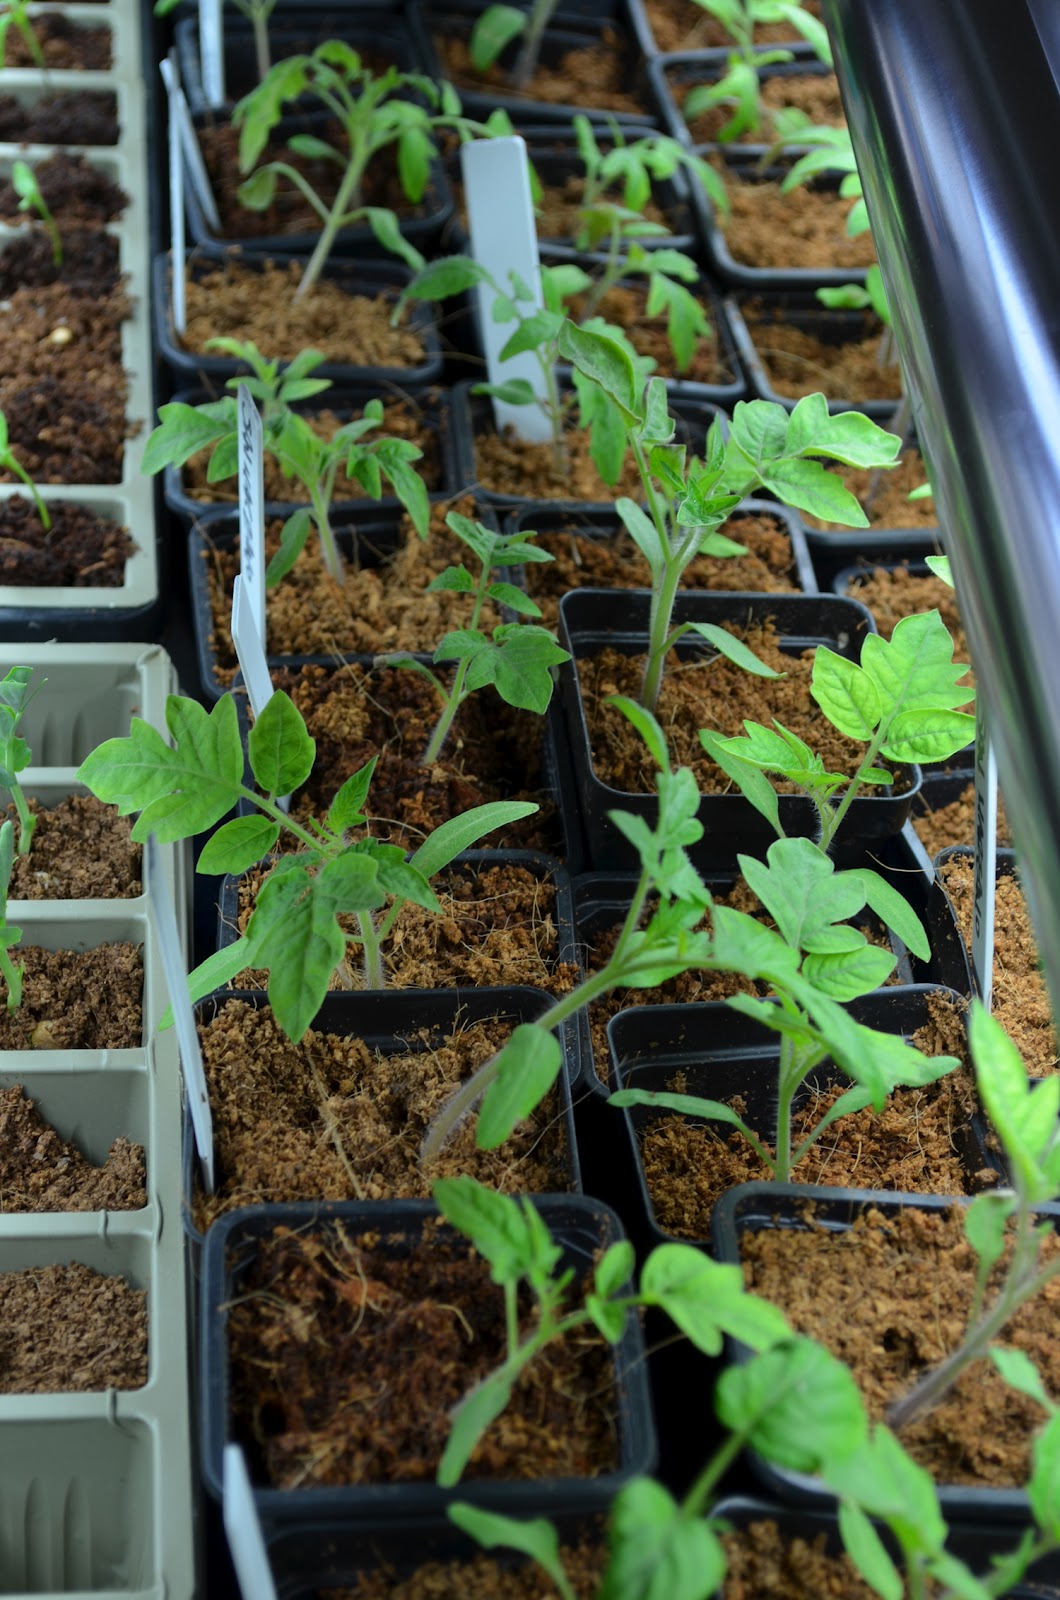
10 day old tomatoes, transplanted into their own containers. They were buried to their first set of leaves to help grow sturdier stalks. (Tomatoes will grow roots all along their stalks.)


2 week old tomatoes.


3 week old peppers. (SO SLOW!)


3 week old tomatoes.


4 week old peppers. Finally big enough for their own containers!


Same peppers, different angle. 4 weeks old.


4 week old tomatoes. We're about 2 weeks away from transferring them to the garden!


More 4 week old tomatoes.


Basil at about 1 week old.


Basil now! I'll be putting them in their own containers tomorrow, and transplanting in a couple of weeks.


I learn a TON every year gardening. Next year, I think I'll start my peppers a month or so earlier. From some reading I've been doing, I've found that peppers do better if they have 12 weeks or so indoors before going outside. I'll also not forget to start my basil at the same time as the tomatoes, meaning that my basil will be bigger at this time of year next year.

Are you growing anything this year? What sage advice can you pass on?


The Radish and the Pea

I am an impatient gardener. There. I said it. I believe seeds should sprout the very moment I put them in the ground, kind of like magic beans.

I believe tomatoes should magically appear on my tomato plants the second they are in the ground.

Seeds drive me nuts. I do better with bedding plants, because I at least know something is going on. I can see it. 

About 10 days ago, I planted sugar snap peas and radishes in my garden. I lovingly ensured their holes were the exact depth they should have been. And if you've ever seen radish seeds, you'd know that is a very tedious task.

In all of my glorious wisdom (and extreme excitement over garden season finally being here), I didn't check the weather before I planted my seeds. It poured the day after I put them in the ground - like a monsoon. 

Every day I have gone out to the garden and crouched down to check for growth. Every day I was disappointed, and completely sure that the rain washed all of my precious seeds away. So what did I do? I started a new batch inside.


That way, I can set out my super trusty bedding plants.

Fast forward to today. I was staring at my garden, mad at it. How dare you not sprout while still in my hands, seeds! I went outside to take the compost out. What do I find?

RADISHES!!!!!!


And a pea!


So after I did my rooster-walk around my garden, patting myself on the back on what an amazing gardener I am and congratulating myself on my incredible patience (note the sarcasm, folks) I took a walk around the rest of the house to see what else this early spring has to offer.

My strawberry plants are getting ready to flower!


I picked these up from the nursery because they reminded me of truffla trees (from The Lorax).


Inside, my oldest daughter and I repotted all of our tomato plants to their own containers now that they have their first set of true leaves. The first picture below is a Brandywine tomato, which has potato leaves instead of the traditional tomato leaf= (like the second photo).


Are you a patient gardener? What gifts has spring brought you?


How To: Build a Pea Trellis

I garden for a variety of reasons. One of the biggest ones is thriftiness - organic vegetables are incredibly expensive at the grocery store, especially enough to feed 5 people. I also love planting something and watching it grow.

I planted sugar snap peas this year, which is one of the earliest spring crops. They need something to climb on for maximum yield and maximum health of the plant. I didn't want to spend eleven bajillionity dollars on a bunch of stuff for the garden, so I came up with a pea trellis using things I had here at home.

You can use a variety of materials for a pea trellis, including twigs! I'll show you how to build a simple trellis using tomato stakes and cotton string.

What you'll need
- a pair of scissors
- a bunch of cotton string (I got this cone at JoAnn's on sale for $9)
- a bunch of tomato / garden stakes, a few feet high. These are usually about $1 each, cheaper if you get them at the end of the season. 

You'll need enough stakes to have one every 2-3 feet or so. 5 gave me enough for my first row, so I went and grabbed some more for the 2nd row from my garage. (I won't be using these for my tomato plants this year because frankly, they don't work. I'll be building a trellis for them as well.)


I'm a conventional gardener and put in rows. So just adjust if you use raised beds. 

Push 1 stake into the ground every 2-3 feet. I went down about 8" and then compacted dirt around the stake. You don't want them blowing around in a thunderstorm.


Taking your cotton string, tie one end to one of your end stakes. I use a bunch of knots. (DON'T cut your string from the cone yet, otherwise you may not have a big enough piece and that is super irritating.)

Wrap your string around the post you tied the knots to, and then wrap it around the next post in line. Repeat this for as many posts as you have in a row, tying it off at the end. Repeat for any other rows you have. Do this at least 2 more times (depending on the height of your stakes); one in the middle and one towards the soil.


You should have something that looks like this. (Should being the operative word here.)


Step in between 2 of your stakes. Tie one end of your yarn in the middle of 2 of your stakes, then wrap it around each horizontal layer. You're now making the vertical space.


Repeat all the way to the bottom string and tie off. Do the same for the rest of your stakes. Just tie a vertical line in between 2 stakes.

You should now have something that looks like this. Plant your peas according to the directions on your seed packet. Once they come up, they'll grab onto your trellis and cover it.


I'll post pictures once the peas overtake the trellis!


A Berry Good Sign!

My kids could eat their body weight in fruit everyday. The price of organic fruit, especially berries, is nuts. I love to garden, so last year I put in a strawberry patch.

I started with 6 plants and resisted every natural urge to let them flower. (It is recommended that you pick the flowers off of the plants the first year they're in the ground so they put more energy into a good root system instead of into making fruit.)

Those 6 plants sent off runners and made new baby plants. I let each plant form 3 babies, and I removed any additional runners. So this year I have 18 strawberry plants. I went out to weed the bed in preparation for the spring equinox, and found a "berry" good sign!


The presences of earthworms in the garden is a great sign that the soil is happy and fertile, which means healthy plants.

I also spied the plants starting leaf production again. I should start seeing flowers in a few short weeks!


Those weren't the only signs of spring. My chives are coming back in!


The roses are setting leaves.


Walking barefoot around the yard did remind me that we had a little over 3" of snow just 2 days ago. My husband spent the day building an igloo. Sadly, (or not so sadly. I vastly prefer warm weather to cold!) here is all that remains of it.


What is your favorite time of year? Are you planting a garden?


Playsilk Giveaway - Set of 6 Mini Playsilks

Playsilks are not only one of my kids' favorite toys, they are one of my favorite toys as well. I'm often asked to make capes out of the them for the bigger kids, and the baby wears one as a hat. I've been known to answer my front door with a playsilk around my head (it keeps my hair out of my face!). My oldest uses them as blankets for her dolls.


I'd love to share this fun with you, so I'm giving away a set of mini playsilks for free! You can choose from any of our sets (rainbow, flower bouquet or muted rainbow) or other colors. There are lots of ways to enter:


- Stop by Etsy and tell me your favorite product and why
- Become a Fan on Facebook
- Follow BLT on Twitter
- Follow this blog (on the right hand side of your screen, there is a "join this site" button

Rafflecopter will choose a winner in 1 week. Please leave your email address so I can contact the winner!

Good luck!


It's Snack Time! (The Story of Amazing Popcorn)

Prepare to have your mind blown.

I am a snacker. I love food, and I especially love food while watching TV. My waistline and my thighs do not love food as much as my stomach does.

I saw a pin on Pinterest about making your own popcorn, and had to give it a try. I love popcorn, but really don't like spending a gazillion dollars on the microwave kind, and don't like the franken-list of chemicals that are in it.

Not being a big fan of sweet, I needed to balance it out with some spice. Here is my favorite version of microwave popcorn!

This makes plenty of popcorn, definitely enough to share!

What you need:

1/2 cup popcorn seeds
1 brown paper lunch bag (which is reusable!)
Flavorings of your choice. 

In this recipe, you need:

1/2 tablespoon cumin
1/2 tablespoon sugar
1/4 tablespoon red pepper flakes
1/2 teaspoon salt
Butter (You can use a little, or a lot. I used 3 tablespoons. Don't judge me.)


Carefully pour the popcorn kernels into the brown paper bag.


Fold the top of the bag over on itself several times, unless you'd like to clean a ton of popcorn out of your microwave. (Ask me how I know this.)


Put the bag into your microwave and nuke for 2 minutes on high. (Popcorn should start popping 30 seconds in.)

While your popcorn is popping, melt your butter in a saucepot. When it is melted, add in your seasonings.
Stir just until the sugar / salt is dissolved.


Your popcorn should be done popping by now. Take it out of the microwave and pour it into a bowl.

(Naked popcorn.)


Pour your molten seasoning concoction all over the popcorn and mix it up. (Don't burn yourself!)

(Properly dressed popcorn.)


If you're feeling nice, call your spouse downstairs and tell them you made delicious popcorn. Or if you're like me, grab the bowl of popcorn and hide in your studio and write a blog post about making said popcorn.


Enjoy!